Fritzbox 7530 modem guide
In this article
Getting Started
What’s in the box
- 1 x Fritzbox modem
- 1 x power adaptor (black)
- 2 x ethernet cable (yellow)
- 1 x Quick start guide
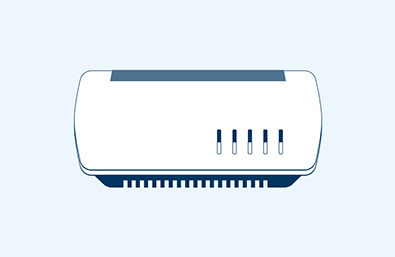
Step 1: Connect your modem
Plug one end of the DSL cable into the DSL/TEL (Grey) port located at the back of your modem.
Then connect the other end to your phone socket.

Step 2: Assemble power adaptor
Assemble the NZ plug adaptor to the power cable as per the images.

Step 3: Plug in and power up
Connect the power cable int othe port labelled ‘power’ located on the back of the modem.
Now plug the power cable into the wall socket. Wait a couple of minutes for the modem to power up and connect.

Step 4: Connect to WiFi
On your computer or device look for the network name 2degrees broadband - if there’s more than one select the network with the strongest signal.
Enter the WiFi password (WLAN Network key) located on the bottom of your modem.

Step 5: Get the most out of your WiFi
Place your modem up on a solid surface, not the carpet or it might overheat.
Solid objects like walls or furniture can disrupt a WiFi signal, avoid setting your modem up in a cupboard or where there are any other large barriers.
Electronic equipment like TVs and microwaves can affect the performance of your WiFI the most.

What’s in the box
- 1 x Fritzbox modem
- 1 x power adaptor (black)
- 2 x ethernet cable (yellow)
- 1 x Quick start guide

Step 1: Connect your modem
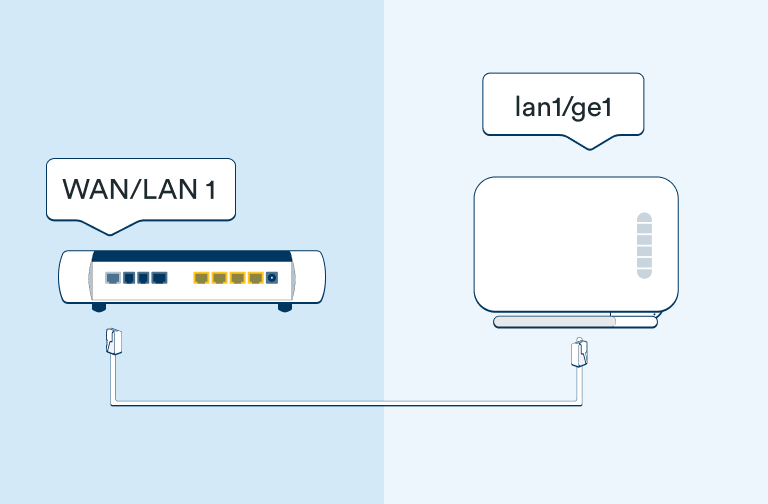
Plug one end of the ethernet cable into the port labelled “WAN” or "LAN1".
Now connect to the other end of the ethernet cable into the port labelled LAN1/GEN1 of your fibre box or into a fibre port in your wall if you’ve got one.
Step 2: Assemble power adaptor
Assemble the NZ plug adaptor to the power cable as per the images.

Step 3: Plug in and power up
Connect the power cable in the other port labelled ‘power’ located on the back of the modem.
Now plug the power cable into the wall socket. Wait a couple of minutes for the modem to power up and connect.

Step 4: Connect to WiFi
On your computer or device look for the network name 2degrees broadband - if there’s more than one select the network with the strongest signal.
Enter the WiFi password (WLAN Network key) located on the bottom of your modem.

Step 5: Get the most out of your WiFi
Place your modem up on a solid surface, not the carpet or it might overheat.
Solid objects like walls or furniture can disrupt a WiFi signal, avoid setting your modem up in a cupboard or where there are any other large barriers.
Electronic equipment like TVs and microwaves can affect the performance of your WiFI the most.

Advanced Settings
Help with managing the trickier bits of your modem like changing passwords, resetting your modem and more.
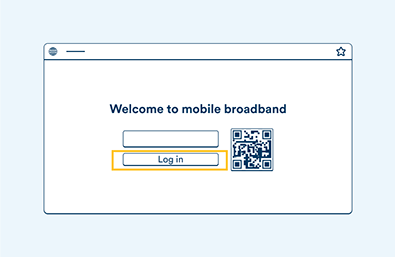
Follow these steps to access your modem to make setting changes. To do this you will require a device connected to the modem either connected via Wi-Fi or with a cable directly to the modem.
Step 1: Open any web browser such as Chrome, Firefox, Edge. (Be sure to turn your mobile data off before doing this)

Step 2: In the address bar, type 192.168.178.1 or, enter fritz.box and press enter

Step 3: Enter your modem login information.
Check the bottom of your FRITZ!Box modem to find your FRITZ!Box password.

Step 4: Click ‘Log in'
If this is the first time accessing the modem you will be prompted with a Diagnostics and maintenance popup, just click OK to proceed.
Follow these steps to factory reset your modem. Please note that by factory resetting your modem will restore any changes you’ve made to the modem back to default. This includes your Wi-Fi name and password.
Step 1: Unplug your modem for 60 seconds
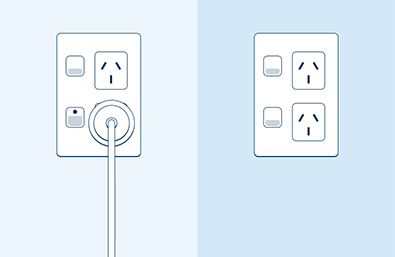
Step 2: Power on your modem at the wall and wait 2-3 minutes.

Step 3: Connect your device to the WiFi network or connect your device to the modem with an ethernet cable.
Ensure your mobile data is turned off if using a mobile.

Step 4: In the address bar of your web browser enter the following address: 192.168.178.1 or alternatively fritz.box within the next 10 minutes.

Step 5: Click the "Forgot your password?" link.

Step 6: Click the "Restore Factory Settings" button
NOTE: This process can take up to 5 minutes. Please be patient during this time and don’t turn off the modem.

Reset complete
If you are still experiencing issues with connecting to the internet you will need to call our Customer Care on 0800 022 022

Follow these steps to activate the WPS mode to connect your devices without a password.
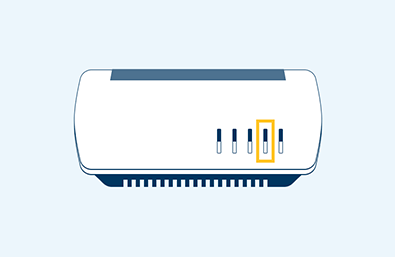
Step 1: Press the WPS button
This button should be on the front of your modem. You’ll need to hold down the button for 2 to 3 seconds or until the Connect/WPS light starts to flash.
Step 2: Connect another device
- Begin by initiating WPS on the device you are attempting to connect.
- Once your modem enters the WPS mode, you have 2 minutes to connect a device.
- After 2 minutes, the WLAN lights will stop blinking.
- The WPS function is then ready to set up a new wireless connection for the next device.
- New devices can be connected by repeating the steps above.
- WPS connectivity is not available on devices with Android 9.0 or newer and is not supported on iOS devices.

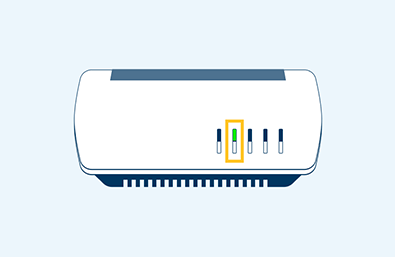
Follow these steps to turn your Wi-Fi off or on. When your WiFi is turned on, the WLAN light will be green.
Step 1: Briefly press and release the WLAN button
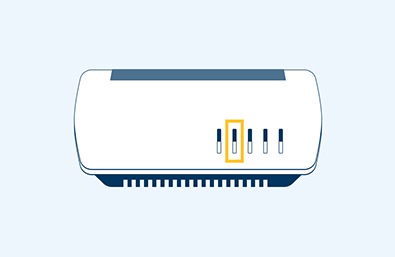
Step 2: Watch the WLAN light.
The WLAN light will go solid green (if you’re turning WLAN on) or will turn off (if you’re turning WLAN off).
Follow these steps to change the Wi-Fi name and/or password. If you’re unsure how to access your modem, please refer to the ‘Accessing the modem’ section of this guide.
Step 1: Click ‘Wi-Fi’ in the User menu
This can be found on the left of the screen if you’re on a computer. If you’re on a mobile device, open the burger menu and select WiFi from the drop down menu. Then select the WiFi Network button.

Step 2: Enter a new WiFi network name
In the field marked ‘Name of the Wi-Fi network (SSID)’ enter a new name.

Step 3: Click ‘Apply’ to save the settings
All Wi-Fi connections to the FRITZ!Box are disconnected when you create a new WiFi network name. You’ll need to reconnect each devices to the new Wi-Fi network. To do this, you may have to go into your WiFi settings and set your device to “forget” the WiFi network before reconnecting to it.

Step 4: Reconnect mobile devices
A pop-up with your current Wi-Fi details will also appear on screen along with a QR code to make it easier to reconnect your mobile devices. Just open your phone’s camera and point it at the QR Code on screen to connect to the network.

Follow these steps to change your Wi-Fi password. If you’re unsure how to access your modem, please refer to the “Accessing your modem’ section of this guide.
Step 1: Click ‘Wi-Fi’ in the left hand menu.
This can be found on the left of the screen if you’re on a computer. If you’re on a mobile device, open the burger menu and select WiFi from the drop down menu. Then select the Security button.

Step 2: Enter a new WiFi password.
Enter your new password in the ‘Network key’ field. Remember to use numerals, letters, and other characters, and mix upper and lower case letters.

Step 3: Click ‘Apply’ to save the settings.
All Wi-Fi connections to the FRITZ!Box are disconnected when you create a new WiFi password. You’ll need to reconnect each device to the new Wi-Fi network. To do this, you may have to go into your WiFi settings and set your device to “forget” the WiFi network before reconnecting to it.

Step 4: Reconnect mobile devices.
A pop-up with your current Wi-Fi details will also appear on screen along with a QR code to make it easier to reconnect your mobile devices. Just open your phone’s camera and point it at the QR Code on screen to connect to the network.

Follow these steps to change your modem password. If you’re unsure how to access your modem, please refer to the “Accessing your modem’ section of this guide.
Step 1: Click ‘System’ in the left hand menu.
This can be found on the left of the screen if you’re on a computer. If you’re on a mobile device, open the burger menu and select System from the drop down menu. Then select the FRITZ!Box Users button.

Step 2: Click the ‘edit’ button.

Step 3: Enter a new password.
- Remember to use numerals, letters, and other characters, and mix upper and lower case letters.
- Do not use a password that you already use for other services, such as an email account, Amazon, Facebook, or Google.

Step 4: Click ‘Apply’ to save the settings.

Follow these steps to configure the guest network. If you’re unsure how to access your modem, please refer to the “Accessing your modem’ section of this guide.
Step 1: Click "Wi-Fi" in the left hand side user menu.
This can be found on the left of the screen if you’re on a computer. If you’re on a mobile device, open the burger menu and select WiFi from the drop down menu. Then select the Guest Access button.

Step 2: Enable guest access

Step 3: Offering password-protected internet access
- Enable the option Private Wi-Fi guest access.
- For the ‘Name of the Wi-Fi guest access (SSID)’, enter the name that your guests should see when they search for Wi-Fi networks.
- Select the desired encryption method from the drop-down list ‘Encryption’.
- Enter a password that is between 8 and 63 characters long in the ‘Network key’ field. Use numerals, letters, and other characters, and mix upper and lower case letters.

Step 4: Offering internet access without password protection
- If you want to offer your guests internet access that is not password-protected:
- Enable the option ‘Public Wi-Fi hotspot’.
- For the ‘Name of the Wi-Fi hotspot (SSID)’, enter the name that your guests should see when they search for Wi-Fi networks.
- Click ‘Apply’ to save the settings

Step 5: Regulating internet use for guest access.
All devices in the guest network are assigned the ‘Guest’ access profile in the FRITZ!Box parental controls.
You can manually adjust the ‘Guest’ access profile, if necessary, for example if you want to limit internet use in the guest network to certain times or block access to certain websites:
- Click Internet in the user menu.
- Click Filters in the Internet menu.
- Click on the Access Profiles tab and then click the Edit button for the Guest profile
- Select the option Restricted for the ‘Period’.
- Click the Internet use blocked button and then hold down the left mouse button while you drag the mouse across the areas of the timetable when internet use should be blocked.
- Click OK to save the access profile.

With parental controls, you can create access profiles for all users or user groups whose internet use you want to regulate individually. We also have a handy video guide to help you set up parental controls.
Step 1: Click ‘Internet’ in the user menu.
This can be found on the left of the screen if you’re on a computer. If you’re on a mobile device, open the burger menu and select Internet from the drop down menu. Then select the Filters button.

Step 2: Click on the "Access Profiles" tab
Now click the New Access Profile button.

Step 3: Enter a new profile name
In the ‘Name’ field, enter the name of the user or user group you want to regulate internet use for.

Step 4: Select the time for restriction
Click the Internet use blocked button and then hold down the left mouse button while you drag the mouse across the areas of the timetable when internet use should be blocked.

Step 5. Select the time for usage
- In the ‘Period’ window, specify the times when internet use should be allowed.
- In the ‘Time Budget’ window, specify how long the internet can be used on the individual days of the week. Time budgets are not suitable for use with messengers such as WhatsApp because they access the internet all the time.
- If you set up a time budget and want all the devices with this access profile to share the available time, enable the option shared budget.
NOTE: It only makes sense to use shared budgets for access profiles for users who access the internet with more than one device (for example for your child's smartphone, computer, and game console). This option is not suitable for user groups.

Step 6: Block Guest Access
Enable the option Use of guest access blocked in the same menu.
Step 7: Limit access to specfic websites
- Enable the option Filter websites
- To block access to certain websites, enable the option Block websites
- If you’ve enabled the option to block access to certain websites, you’ll need to specific which websites to block. This is found under the ‘List’ tab.
- Click Edit next to the blocked websites section.
- Type the address of the websites you wish to block. (example Facebook)
- Click Apply to save your changes
- Click OK to save the access profile.
NOTE: Any profiles with the option to block access to certain websites will use the same list of blocked websites.
You can assign the access profiles you’ve created, the default profiles for all users, and ser groups whose internet use you want to regulate individually.
Step 1: Click ‘Internet’ in the user menu
This can be found on the left of the screen if you’re on a computer. If you’re on a mobile device, open the burger menu and select Internet from the drop down menu. Then select the Filters button.

Step 2: Click "Block" for required devices
Choose which devices may not access the internet on your WiFi network.

Step 3: Select unlimited access profiles
Click Change Access Profiles
If the device should have unrestricted internet access, select the Unrestricted access profile from the drop-down list.

Step 4: Set limited access profiles
- If you want to limit internet access for the device, select one of the access profiles you created from the drop-down list. For example, let’s assume you’ve created the access profile ‘Kids profile for your child. If your child uses their smartphone, computer, and game console to access the internet, assign all three devices to the ‘Kids profile’ to budget their screen time.
- Click Apply to save the settings.
- In the FRITZ!Box you can block and unblock internet access for devices in the home network with just one click.

Using general access profiles
General access profiles are already preconfigured in the FRITZ!Box to make it easier for you to set up access profiles for all the devices in the home network to define in detail how long and when internet use is allowed on individual days of the week, and which sites each profile can access. These profiles include:
Standard: All the devices in the home network use this profile by default and it is automatically assigned to all new devices in the home network.
Unrestricted: Devices that use this profile can always access the internet without restrictions.
Guest: This profile applies to all devices in the guest network and can be changed to suit your needs.